Silicone Cell Creation: Advanced Fluid Art Methods
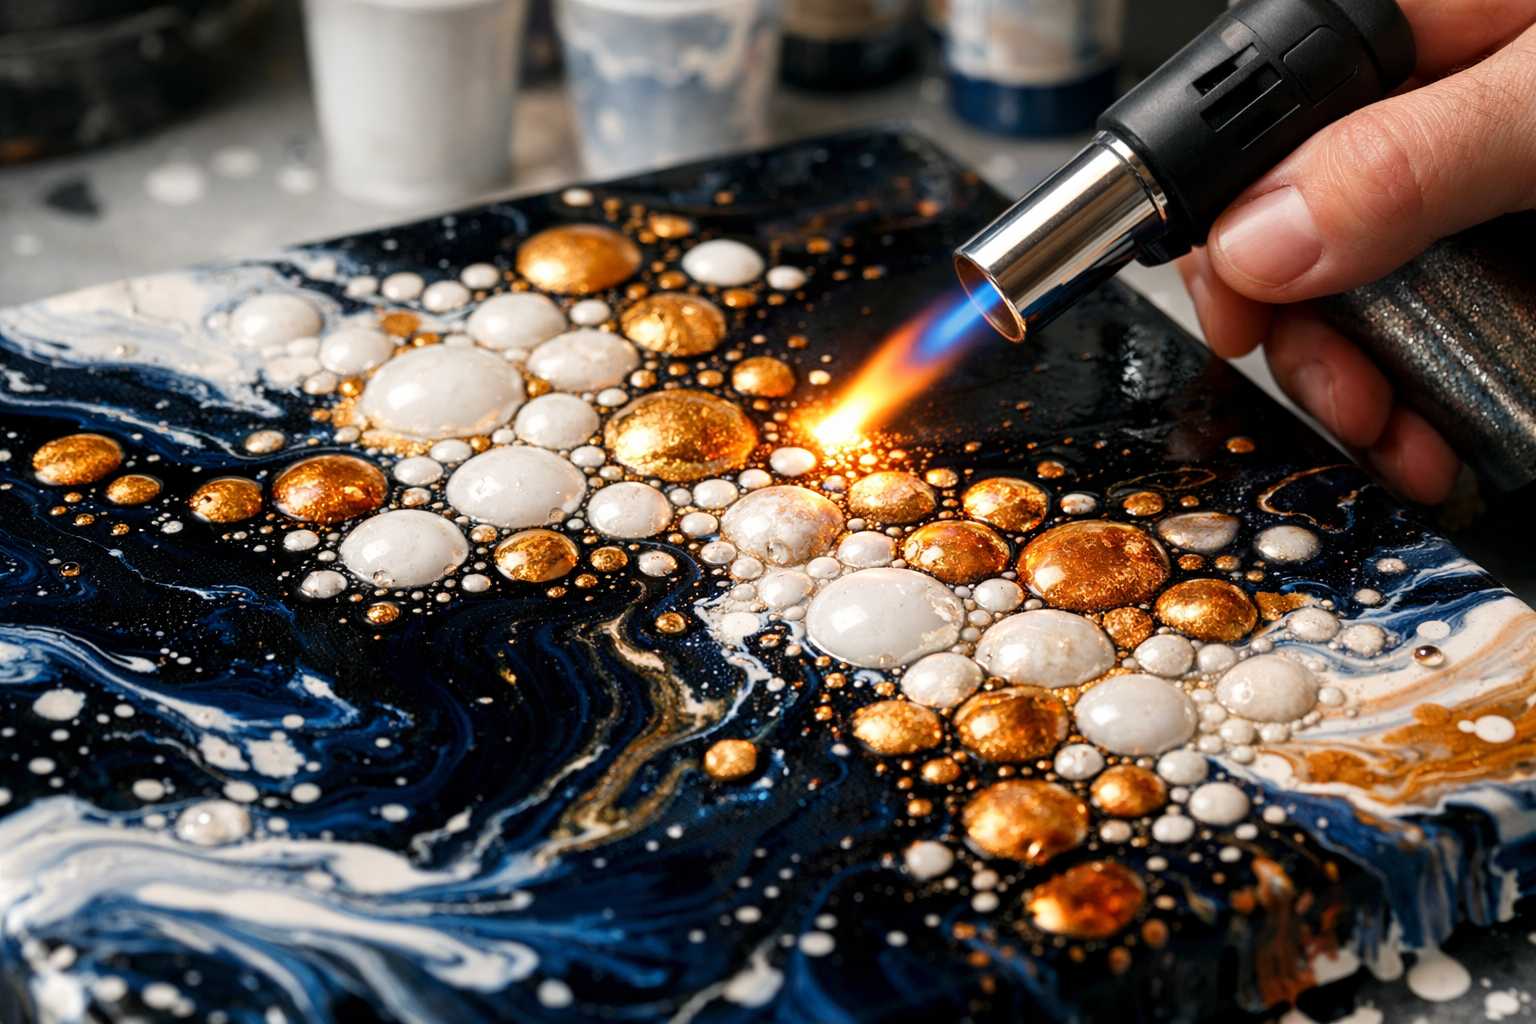
The Art of Creating Silicone Cells: Exploring Advanced Techniques in Fluid Art
Ever wondered how those captivating cells in fluid art paintings are made? Your curiosity ends here! In this guide, we'll dissect the wonders of creating silicone cells using advanced strategies that can utterly transform your fluid art.
Unraveling the Charm of Silicone Cells
Silicone cells are unquestionably the heart and soul of fluid art, imitating bubbles like organic formations that bestow depth and motion in your painting. This catches the eye and rivets the viewers' attention.
Through fluid art, silicone oil rises through layers of paint, inciting the creation of cells that seem to waltz across your canvas. It's a beautiful example of art through chemistry!
Delving into the Science of Cell Formation
Here's a brief explanation of what transpires during cell production. Silicone, having lower density than acrylic paint, naturally seeks to reach the surface.
By incorporating silicone into your paint mix, surface tension is generated. The silicone bursts through the superior layers of paint, instigating the formation of cells that are truly delightful.
Temperature plays a pivotal role; warmth means more action from silicone, while cold slows down the cell production process. Remember this when preparing your pours.
The Must-haves for Advanced Cell Creation
To attain expert results, specific materials are required, including:
Silicone-Related Products: - Treadmill belt lubricant (the preferred choice) - Dimethicone (silicone used in cosmetics) - WD-40 (although it doesn't have archival quality) - Hair serum that contains silicone
Preparation of Paint: - Premium acrylic paints - Pouring medium (e.g., Floetrol) - Distilled water - Measuring cups and stirring sticks
Mastering Silicone Mixing Techniques
The crux of creating perfect cells lies in conscientious mixing. Too much silicone could leave muddy effects whereas too little might not produce any cells.
Commence with an equal amount of paint and pouring medium. Add just 2-3 drops of silicone for every ounce of paint mixture. Stir gently to prevent the silicone from breaking into minute particles.
For excellent outcomes, consider layering varied silicone concentrations. Use more silicone in your base colors and less in your top layers to achieve diverse cell sizes in your artwork.
Ways to Apply Heat for Superior Cell Formation
Heat is the secret ingredient for striking cell formation. Here are the techniques professionals utilize:
Torch Technique: Swiftly hover a kitchen torch over your wet paint. Keep it moving to avoid burning. The heat awakens the dormant silicone, resulting in new cells.
Hair Dryer Method: Use a hair dryer on a low heat setting. Maintain a 6-8 inch distance from the surface, moving it circularly for even heat distribution.
Heat Gun Usage: This is the most potent option. Exercise extreme caution and keep the gun moving. Heat guns are famed for the most spectacular cell activity.
Color Theory for Compelling Cell Contrast
Your choice of color profoundly affects cell visibility. Combinations with stark contrasts are ideal for cell definition.
Dark base colors teaming with light cell colors produce awe-inspiring effects. Consider black bases with white, gold, or silver cells. The distinction makes the cells stand out strikingly from the canvas.
Complementary colors are also a great choice. Eye-catching results can be achieved with blue bases with orange cells and red bases with green highlights.
Overcoming Common Cell Challenges
Even seasoned artists encounter difficulties with cell creation, here are solutions for the most widespread issues:
No Cells Developing: - Assess your silicone's quality and freshness - Increase silicone concentration slightly - Apply heat to waken dormant silicone
Cells Too Petite: - Increase the amount of silicone in your blend - Consider a thinner consistency of paint - Be more purposeful with heat application
Cells Looking Muddy or Overworked: - Cut back on silicone in your future pours - Cease manipulating the paint once poured - Allow the chemistry to naturally occur
Expert Advice for Maintained Consistency
Attaining consistency stems from understanding your materials. Maintain meticulous records about your successful recipes including silicone brands, ratios, and techniques that have proven effective.
The room temperature greatly impacts your final results. Warmer rooms induce more cell activity, while cooler spaces slow down the process but allow for more control.
Before moving on to large canvases, practice on smaller test pours; this aids in saving costly materials and improving your confidence.
Timing your Cell Activation Just Right
Timing is imperative in silicone cell creation. Apply the heat prematurely, and the cells might vanish. Wait too long, and the paint becomes too viscous.
The ideal time is usually 2-5 minutes following pouring. Look for a slightly settled paint surface; it's at this juncture that heat works best.
Watch to see if natural cell formation occurs, then apply heat if necessary. Sometimes, the chemistry operates flawlessly without much interference.
Safety Precautions during Silicone Use
When using heat tools, always work in a highly ventilated space. Some silicone items release fumes when heated. Remember, health over everything, even perfect cells.
When using torches or heat guns, wear protective equipment. Always keep a fire extinguisher within reach when dealing with an open flame. Safety first, art second.
Proper storage also matters - keep silicone products sealed and at room temperature to retain their effectiveness. Old or contaminated silicone won't produce good results.
Stepping Your Cell Game up a Notch
Feeling adventurous? You could try incorporating a blend of silicone kinds in a single piece. Each silicone behaves uniquely, inviting varied cell sizes.
Experiment with techniques for silicone placement. Sprinkle drops directly onto wet paint surfaces or form intentional patterns through strategic silicone placement.
Give thought to using cell enhancers like Australian Floetrol or particular cell-creating mediums, designed particularly for dramatic cell formation.
Safeguarding Your Cell Masterpieces
A proper finish ensures the preservation of your magnificent cells for a lengthy duration. Allow pieces to dry completely before handling, usually taking a minimum of 24-48 hours.
After it's fully cured, apply suitable sealers. Varnishes or acrylic sealers offer protection to the surface, amplifying colors. Opt for products that suit silicone-infused art.
Document your successful masterpieces with high-quality photographs. The lighting can significantly change how cells appear in photographs; natural lighting generally serves best.
The Finale: Your Path to Becoming a Master of Cell Formation
Mastering silicone cell creation requires practice and patience. Each pour educates you about this intriguing technique. If the results are less than perfect, don't get disheartened.
Don't forget that even "failed" pours often embody beautiful elements. Welcome the unpredictable character of fluid art; it adds uniqueness and charm to each piece.
Persistently experiment with different techniques and materials, and your distinctive style will emerge organically through trial and error. Most importantly, enjoy the creative process.
Embrace these advanced methodologies and watch your fluid art elevate to new heights. Achieving mesmerizing, profession-grade cells is closer than you think. Happy pouring!